Fine-Tuning a Model: The Easiest Way to Start
Fine-tune a small language model with Unsloth Desktop, evaluate it against the base model, export it as GGUF and call it from a Python application — including the configuration mistake, the correction and the actual results.
Chapters
- 0:00What we're building
- 1:47The full fine-tuning journey
- 2:34What fine-tuning actually changes
- 3:42Define the task and output format
- 4:43Structure the training examples
- 5:20Establish a baseline and automate evaluation
- 6:41Training, validation, and test data
- 8:06LoRA and QLoRA explained
- 9:42Choose the model and datasets in Unsloth
- 12:26Configure the training run
- 16:30Gradient accumulation explained
- 17:16Start training
- 18:03The mistake: steps versus epochs
- 20:36Read the training charts
- 22:40Compare responses in chat
- 24:18Run the automated evaluation
- 25:54Compare the scores and plan the next iteration
- 28:09Merge and export to GGUF
- 31:10Load and test the exported model locally
- 33:05Call the model from Python
- 36:36The model still needs a system around it
- 37:32How to approach your first fine-tune
Resources
- Unsloth ↗
- Project code and experiment notes ↗v0.1 archive
- Published v0.1 dataset ↗Hugging Face
- Published v0.1 model ↗Hugging Face
- I Fine-Tuned a Model. The Failures Taught Me More Than the Winning Score ↗IntelligenceOS · the v0.1 experiment
What this showsThe linked v0.1 model and dataset are the earlier published experiment introduced in the video. The tutorial records a separate training run: composite score 75 versus 74 for the base model, and 12 versus 11 correct categories. That is a small observed difference on one evaluation, not an established gain. A learning experiment, not a production finance system.
The written version
Most tutorials on fine-tuning seemed to begin several steps ahead of where I was.
Before I understood what a good training example looked like, I was looking at Python environments, GPU configurations, and unfamiliar training settings. I could follow instructions, but I did not yet have a clear picture of what I was trying to prove.
So I made the tutorial I wanted at that point: a small experiment that goes all the way from defining a task to calling the resulting model from a Python application.
I used Unsloth Desktop, a small Qwen model, and a finance-operations classification task. I made a configuration mistake along the way. I corrected it, completed training, and compared the result with the original model.
The improvement was modest. That turned out to be one of the most useful parts of the exercise.
A finished training run tells you that the training process completed. You still have to find out whether the model became better at the job you gave it.
The workflow I wanted to understand was:
Define a task → build examples → measure the base model → train → evaluate → inspect failures → iterate → export → call from code.
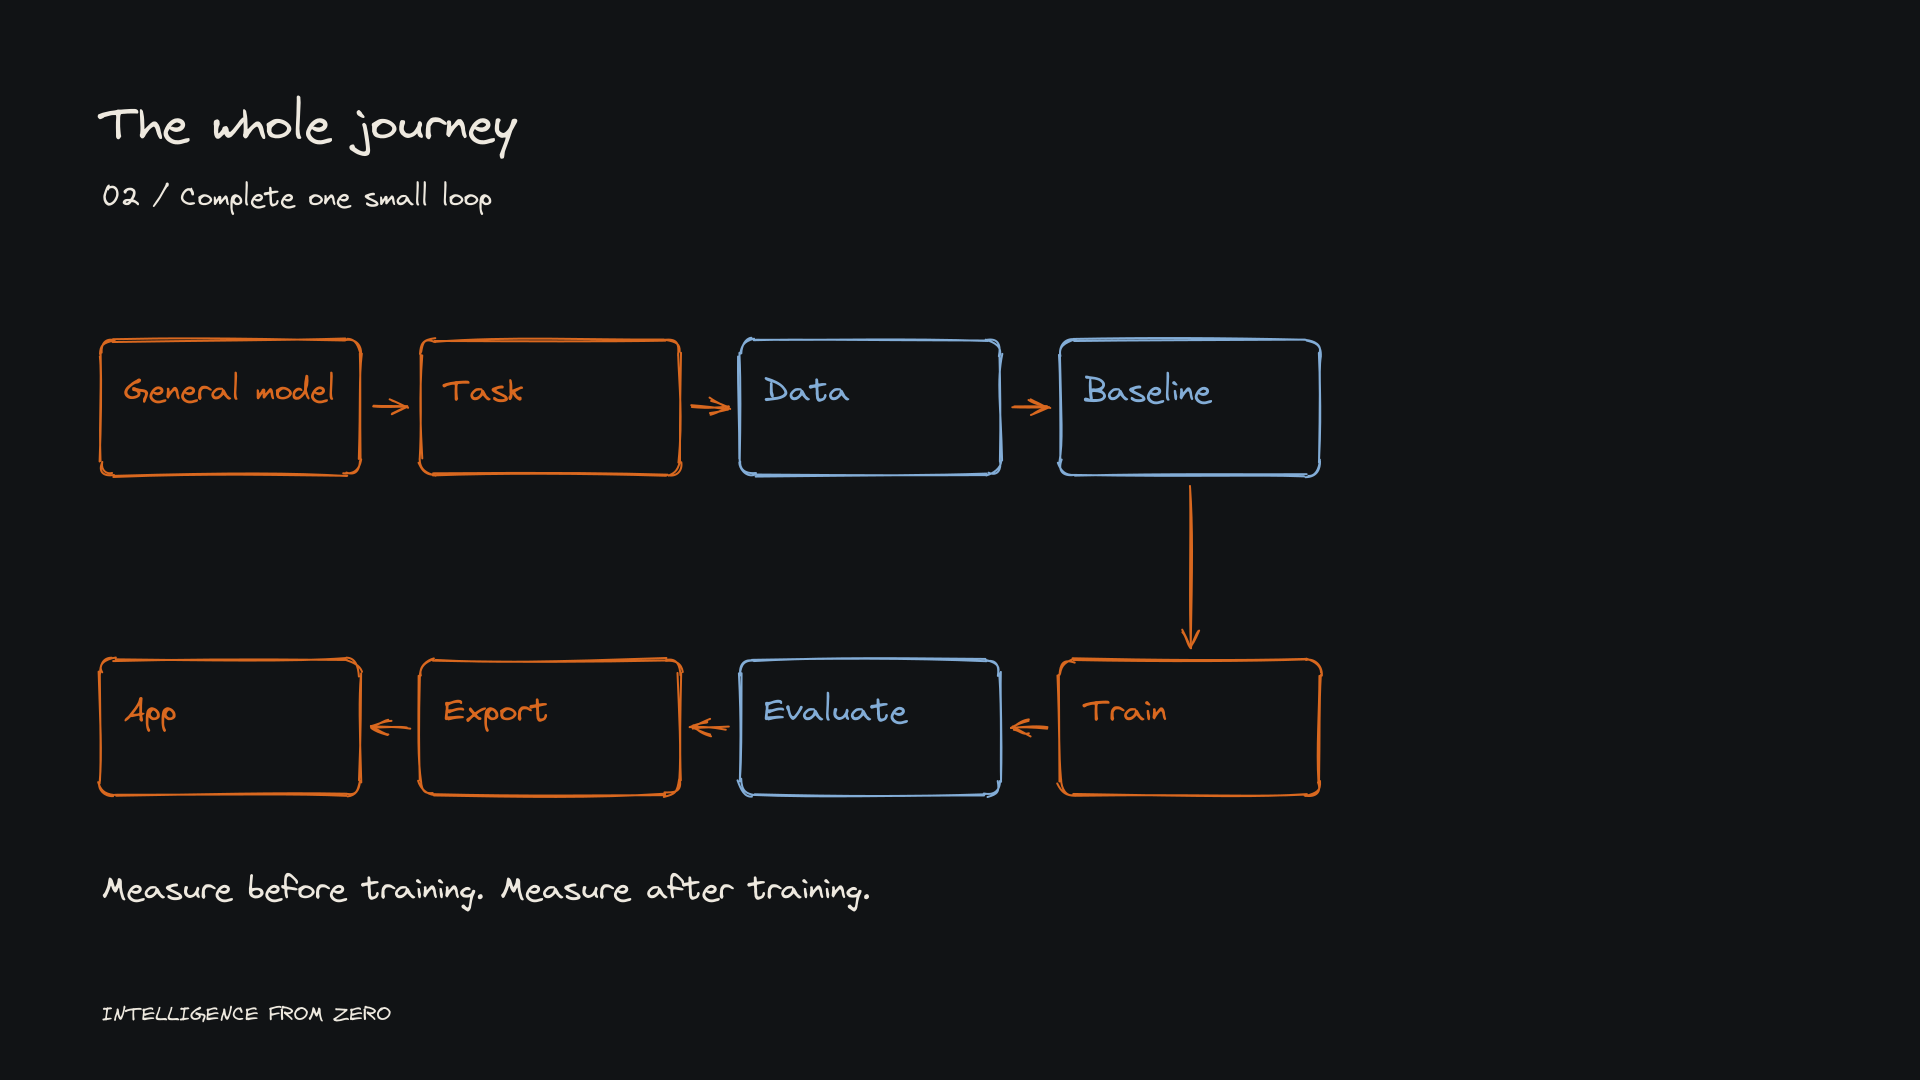
Start small enough that you can inspect what happens at every stage. That is the main constraint I would put on a first fine-tuning project.
Give the model a job you can actually score
For this experiment, I chose a finance-operations triage task.
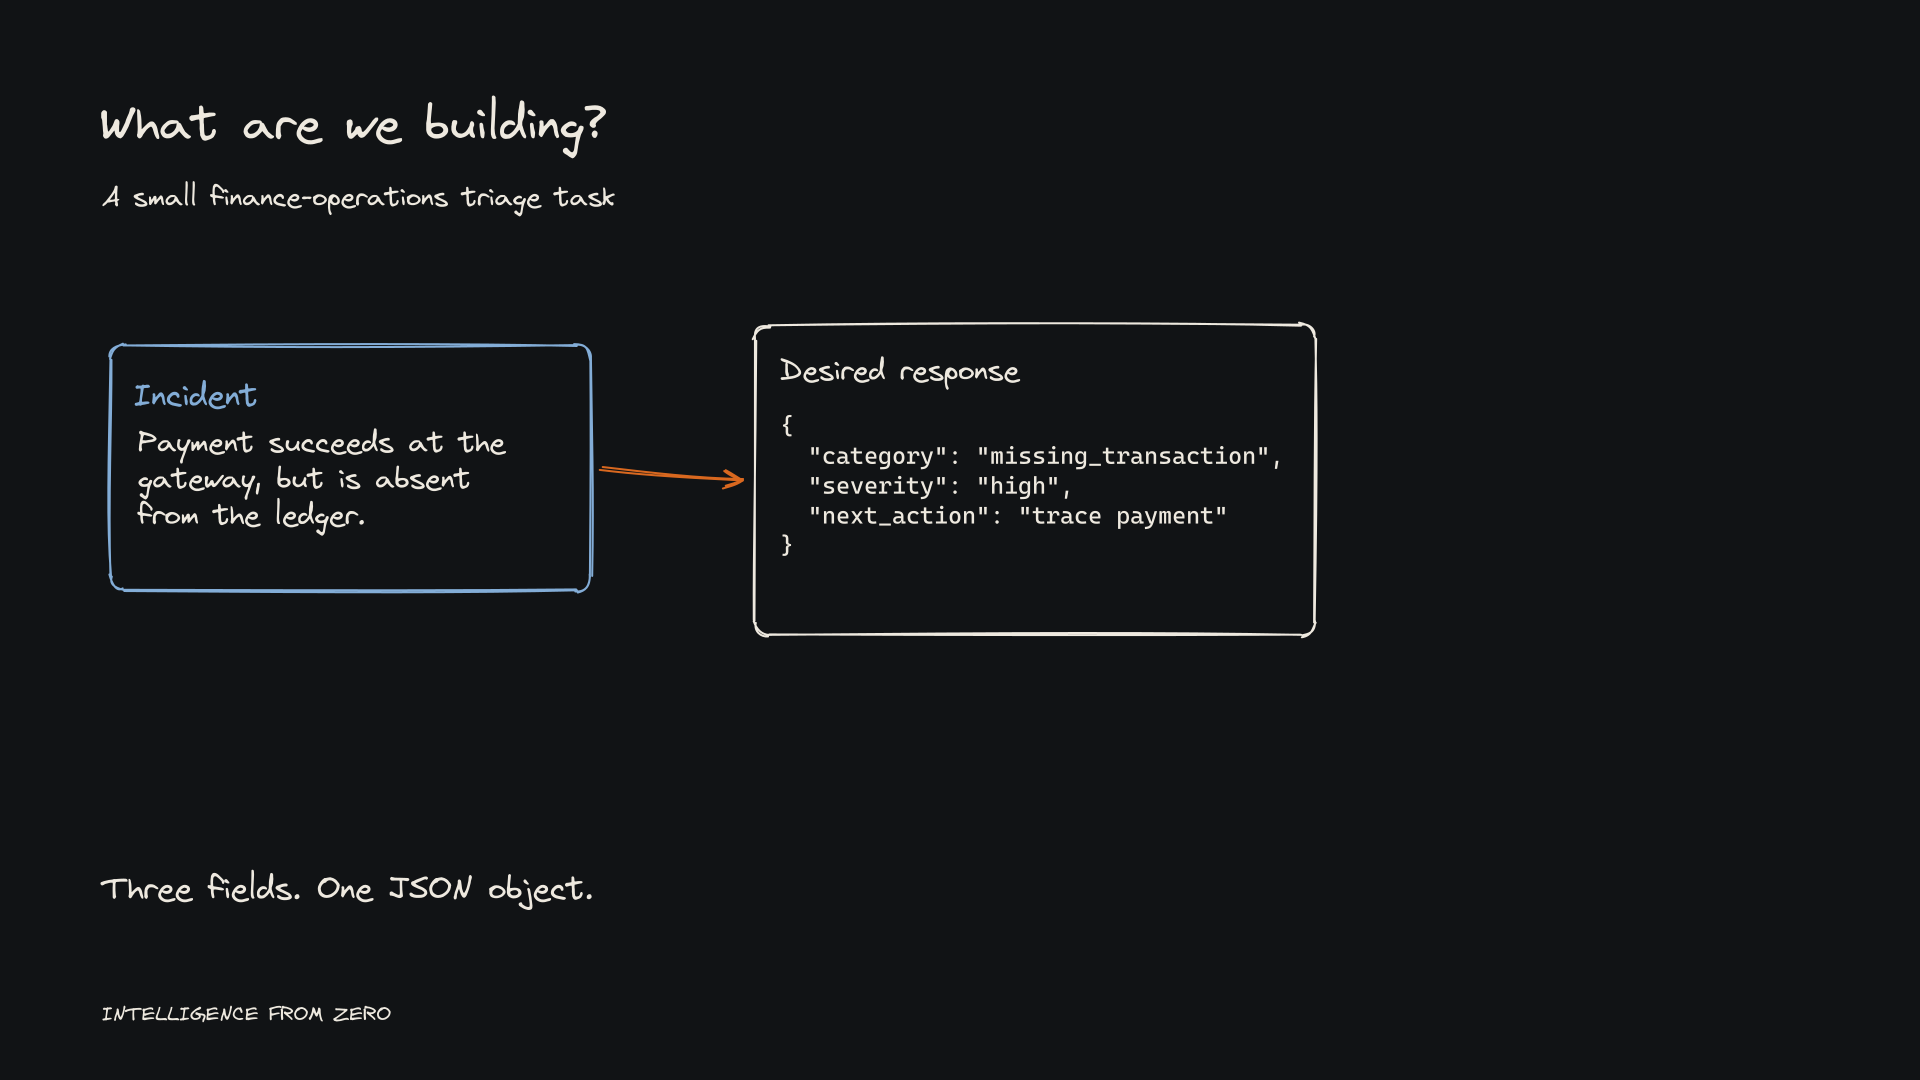
The input is a short incident report. The output must be a JSON object containing exactly three fields: category, severity, and next_action.
Here is an illustrative incident:
“Payment succeeded at the gateway, but there is no matching entry in the ledger.”
A target response under our example policy could be:
{
  "category": "missing_transaction",
  "severity": "high",
  "next_action": "Trace the payment and reconcile the missing ledger entry."
}
This is an example of the desired response, not a quotation of a measured model output. In a real workflow, the severity and next action must follow an explicit operational policy.
The allowed categories in the experiment were settlement_mismatch, duplicate_transaction, missing_transaction, refund_issue, and other. The severity labels were low, medium, and high.
That gives us something concrete to evaluate. Does the response parse as JSON? Does it contain the required keys? Did the model select the correct category and severity? Is the next action appropriate?
It also exposes ambiguity early. If I cannot explain why one incident belongs in settlement_mismatch and another in missing_transaction, more training will not resolve the missing definition for me.
The task definition comes before the training interface. Otherwise, it is easy to spend time adjusting parameters without agreeing on what a successful answer looks like.
What changes when you fine-tune?
A general-purpose model already has useful capabilities. It understands language and can respond in many different ways.
For this task, I want a much narrower pattern: when it sees a finance incident, it should apply a particular classification policy and return a particular structure.
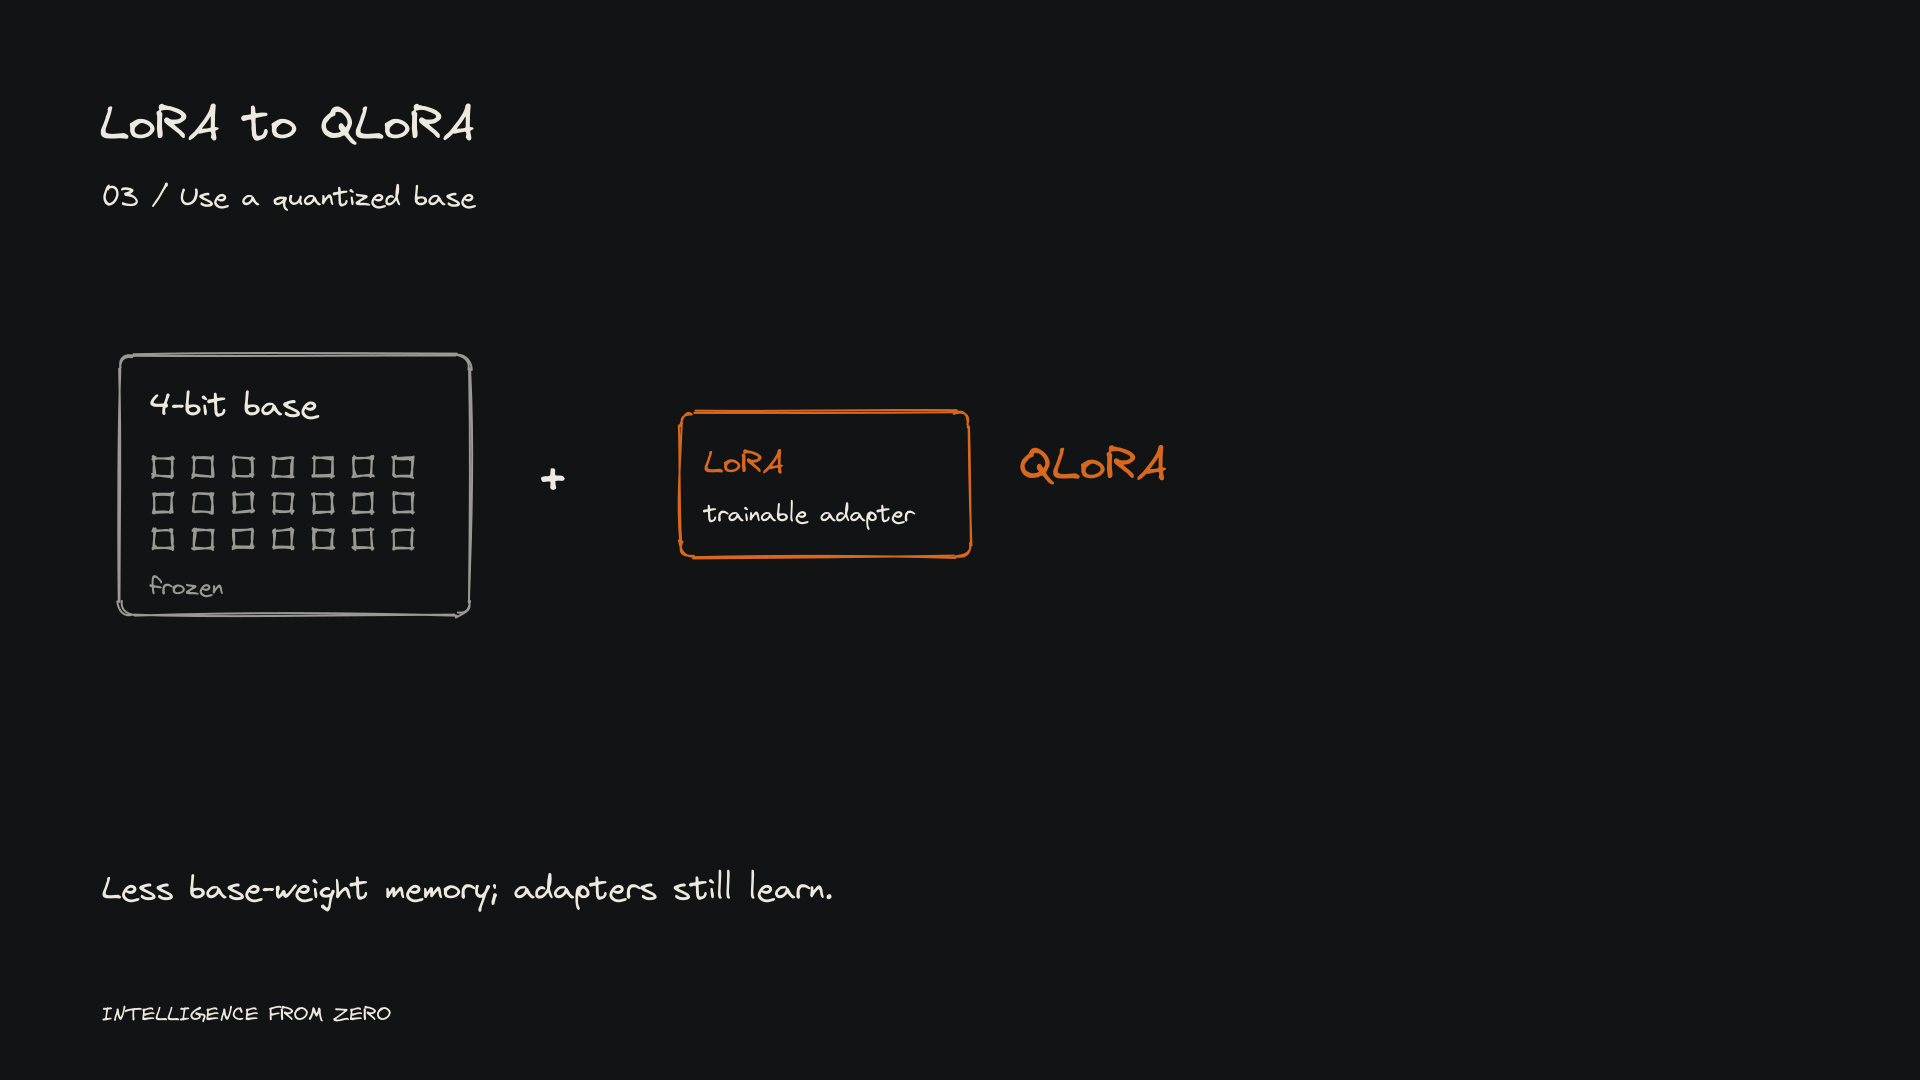
Fine-tuning changes model parameters through examples of that target behavior. In this experiment, I used a LoRA-based approach: the base weights remain frozen while a smaller set of adapter parameters learns. The adapter modifies how the base model behaves; it is not a second model that independently answers the question. (Technical reference: LoRA.)
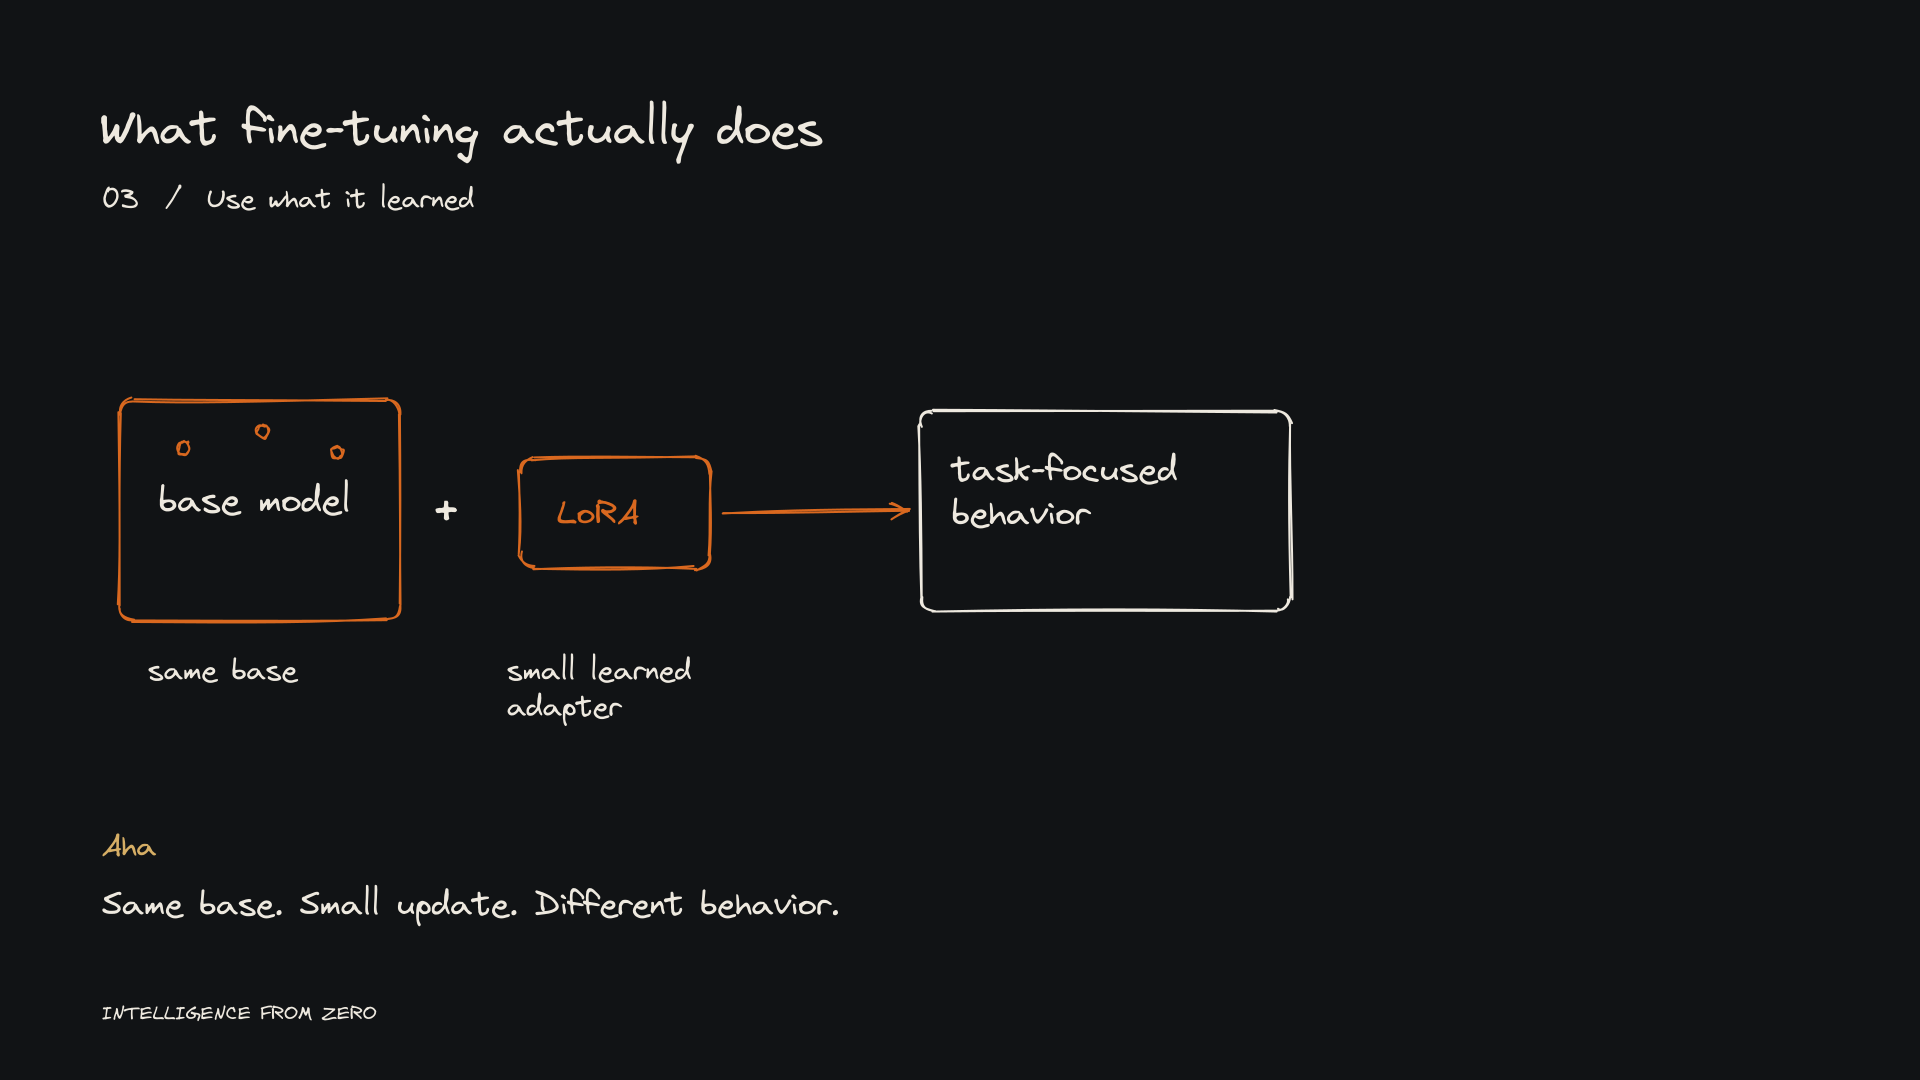
For this project, the useful mental model is learning a response policy through examples. It is not a reliable way to maintain a changing database of facts. If the answer depends on current payment records, the application still needs access to those records.
The dataset is where the behavior becomes explicit
Each training example has three parts:
- System: the task instructions and output rules.
- User: the incident the model must classify.
- Assistant: the desired response for that incident.
The assistant message is the response target in the examples. The precise tokens included in the training loss depend on the trainer’s formatting and masking settings; the important design decision here is that the example contains the behavior we want the model to learn.
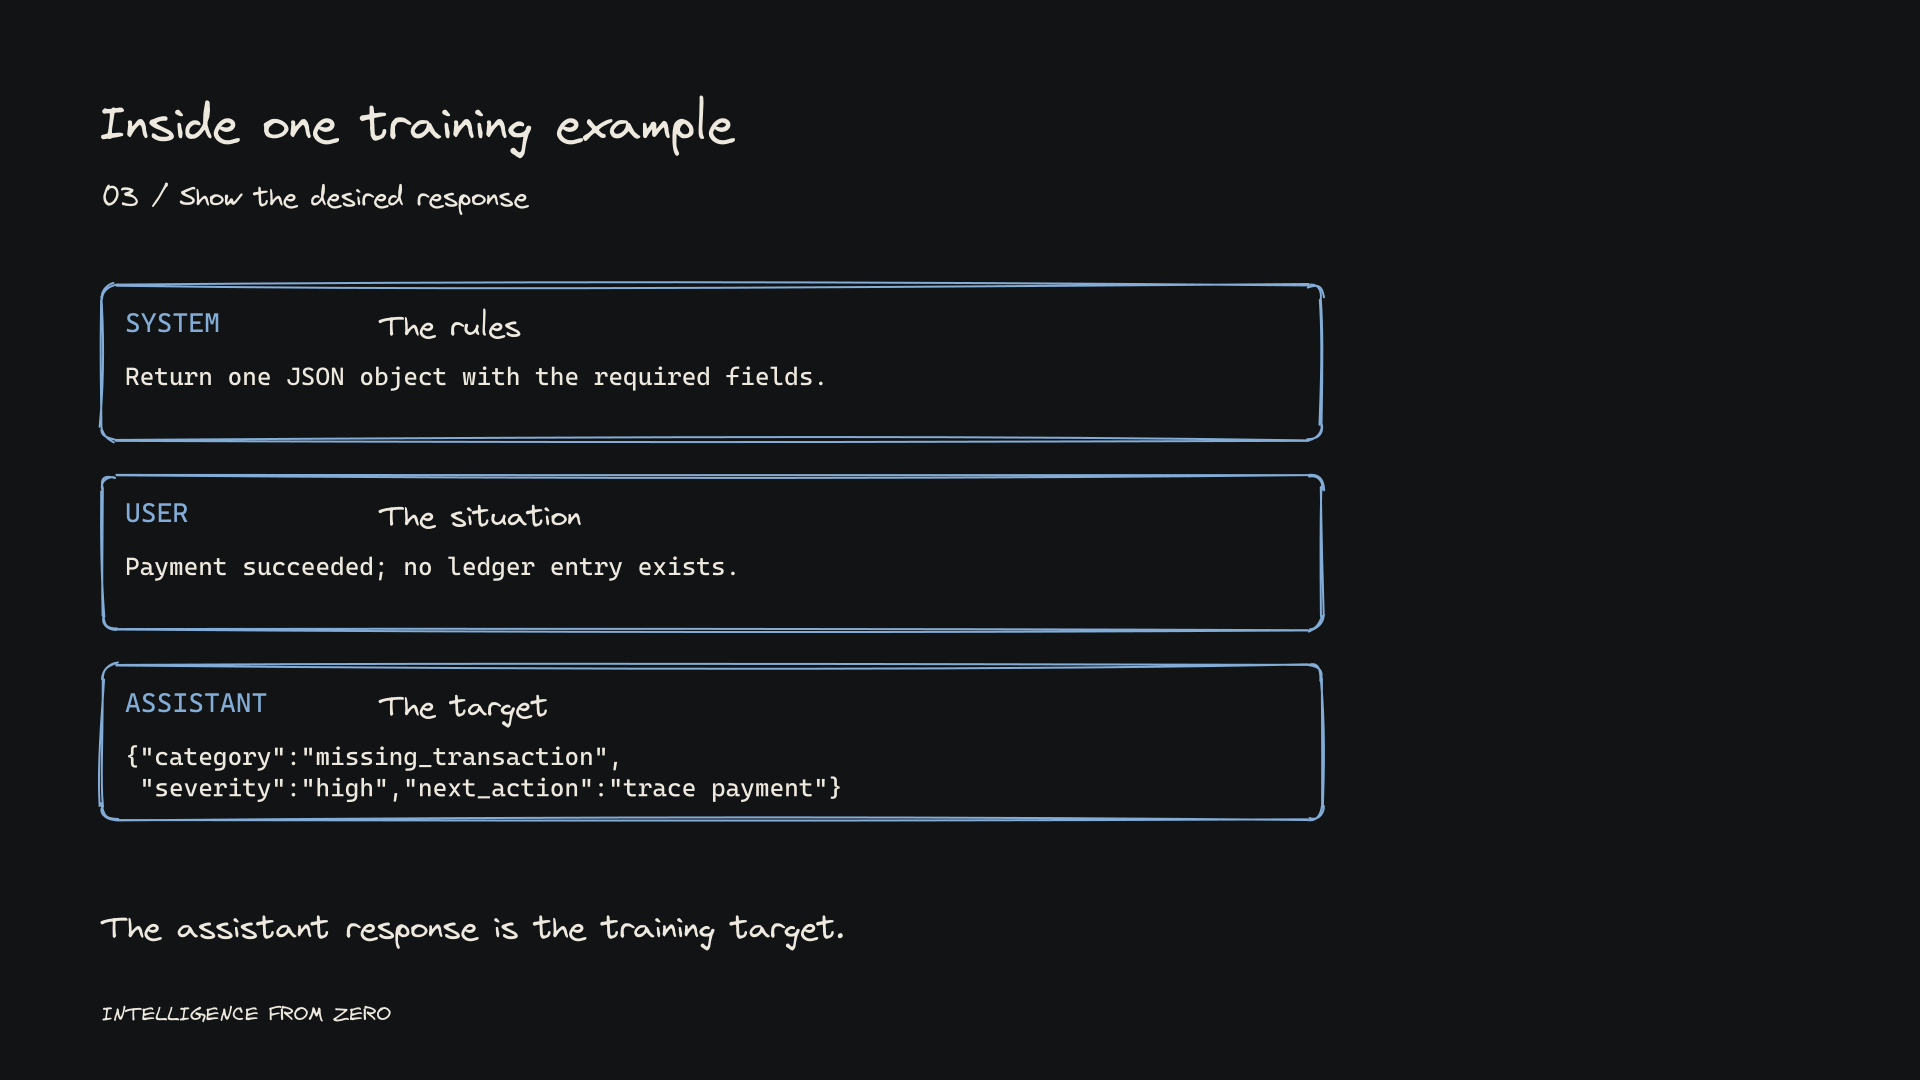
I want variations that teach the decision boundary, rather than many copies of the same sentence. Different wording should lead to the same label when the underlying incident is the same. Incidents that look similar but require different labels need examples too.
For instance, a duplicated record and a missing record can both be described as a reconciliation problem. A useful dataset makes the distinction clear. It should not accidentally teach the model that the word “reconciliation” always means one category.
Synthetic examples can help create an initial learning dataset, but they still need inspection. Generated labels are not automatically correct, and a dataset full of easy, repetitive cases may hide weaknesses that appear as soon as the wording changes.
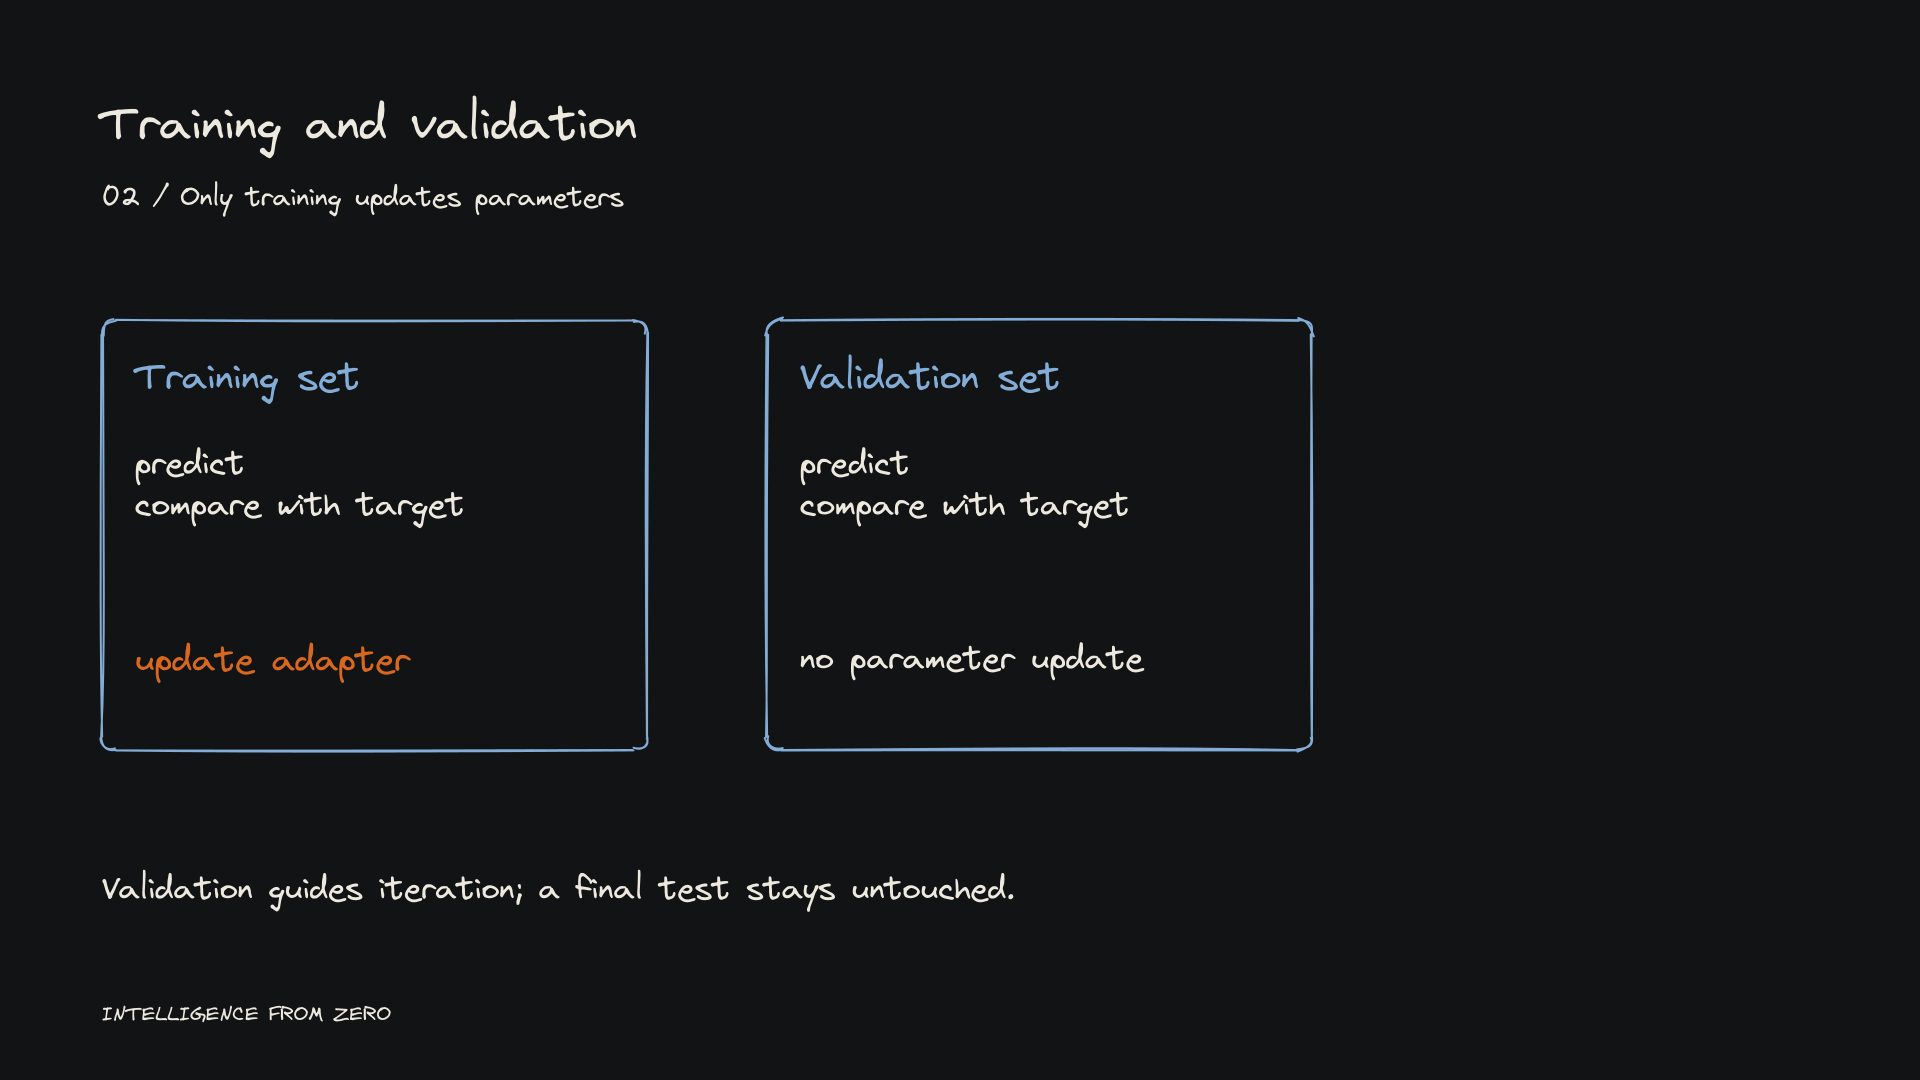
I keep training and evaluation data separate. Training examples update the adapter. Validation examples help me assess and choose between experiments. A final test set should stay untouched until I am ready to assess the chosen candidate.
Calling a file “test” does not preserve that boundary if I repeatedly use its results to decide what to change. Once it guides iteration, I need a separate final check.
Measure the original model first
The first useful result is the baseline.
Before training, I give the original model the evaluation cases and record its answers. Then I can compare the adapted model using the same cases, prompt policy, scoring rules, and comparable generation settings.
Without that comparison, a good-looking answer after training tells me very little. The original model might already have produced it.
For this task, I care about several dimensions of performance:
| Check | What it tells me |
|---|---|
| Category | Whether the incident was classified correctly |
| Severity | Whether the assigned priority matches the policy |
| Valid JSON | Whether software can parse the response |
| Required keys | Whether the response follows the agreed structure |
| Next action | Whether the recommendation is useful and appropriate |
A model can do well on formatting while still making poor decisions. A combined score is convenient, but I need the individual checks to understand what changed.
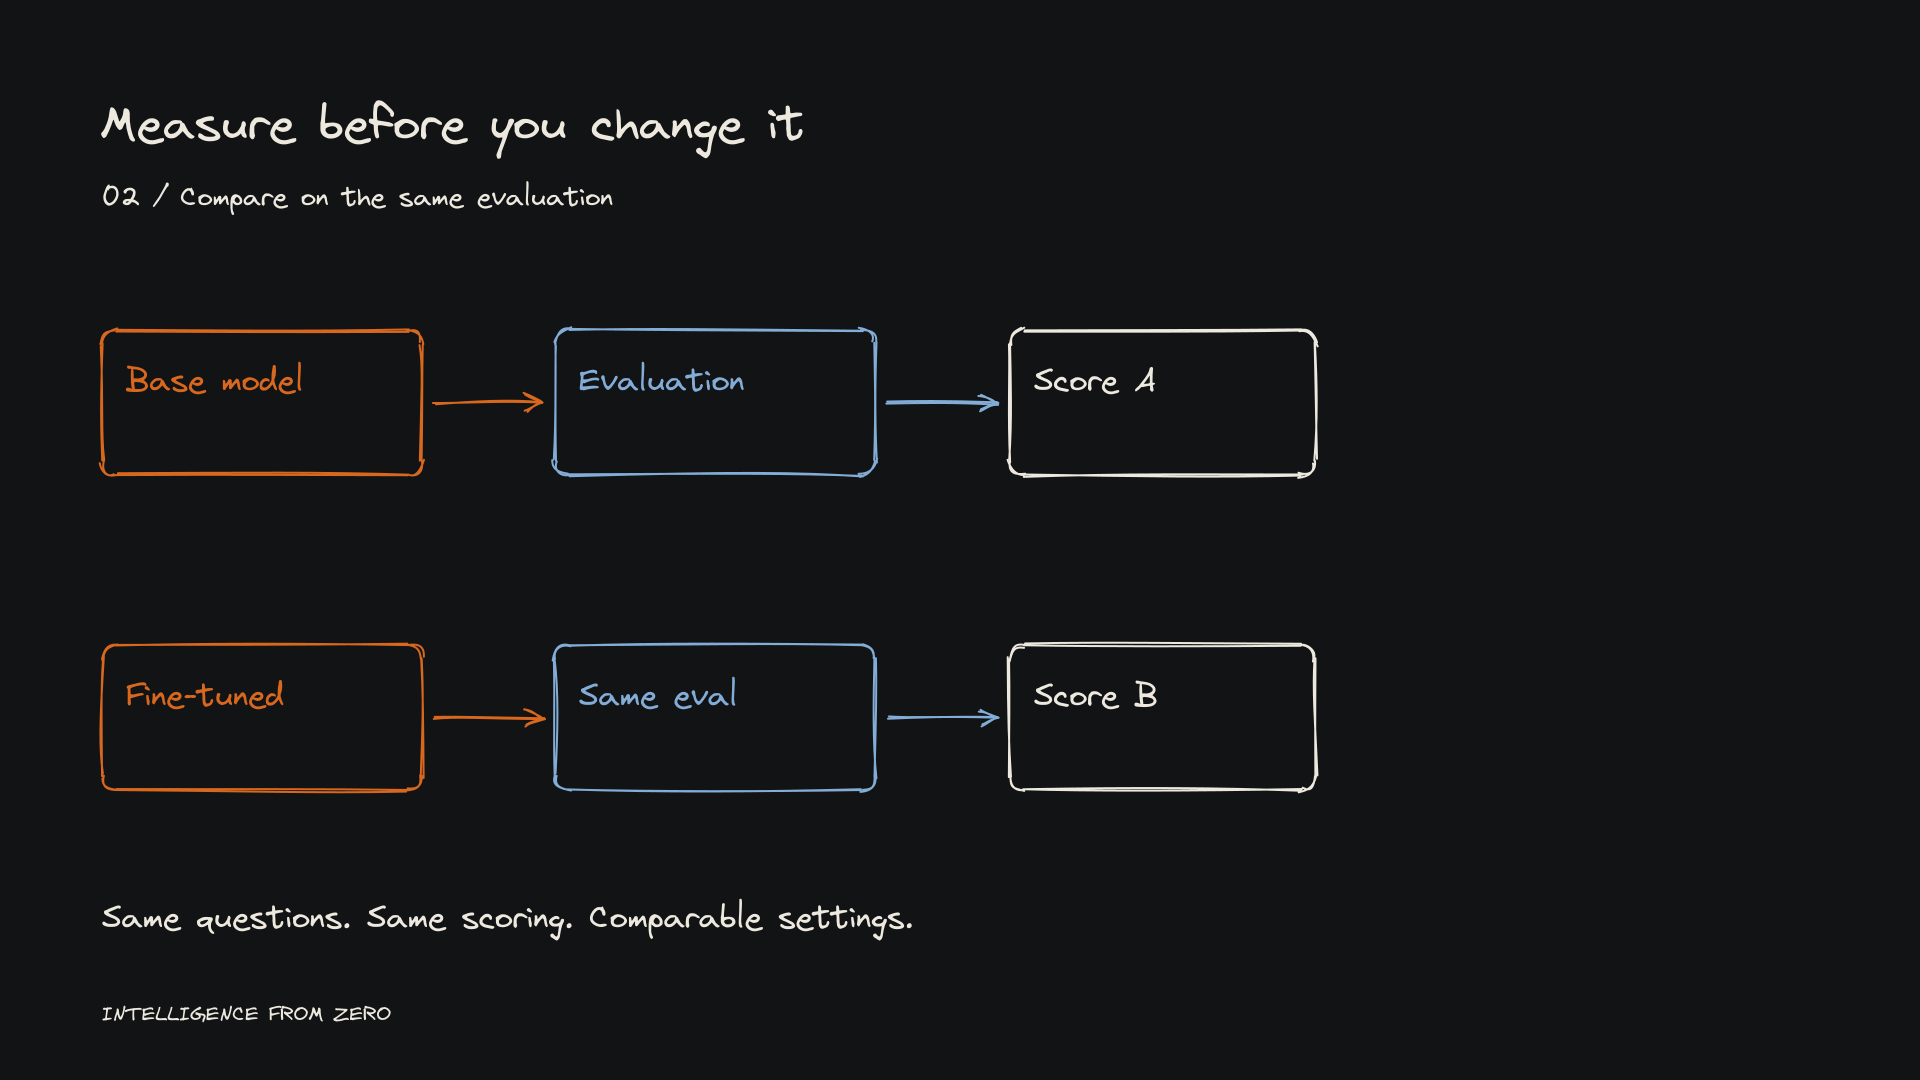
I automated parts of this evaluation through the local API so I could repeat it without manually pasting each incident. Structural checks are straightforward to automate. Judging whether a next action is genuinely appropriate requires a clear rubric and sometimes human review; a non-empty field is not proof of a useful recommendation.
Make the training run small enough to understand
In Unsloth, I selected a small Qwen 2.5 model with roughly half a billion parameters. This was a learning experiment, and I wanted a setup I could iterate on locally.
The QLoRA option uses a quantized base with trainable LoRA parameters. The broad idea is to reduce memory requirements while learning a relatively small update. The original QLoRA paper describes specific techniques such as NF4 and double quantization; the exact implementation depends on the backend. A four-bit option in a desktop interface should not be treated as proof that every detail of that paper is in use. (Technical reference: QLoRA.)
The settings became less intimidating once I connected each one to a question:
| Setting | The question it answers |
|---|---|
| Epochs | How many passes will training make through the dataset? |
| Context length | How much tokenized text can one training sequence contain? |
| Learning rate | How large are the optimizer’s parameter updates, relative to its other calculations? |
| Batch size | How many examples are processed in a mini-batch? |
| LoRA rank | How much capacity does the low-rank update have? |
| Gradient accumulation | How many mini-batches contribute before an optimizer update? |
In the walkthrough, the configuration I discuss includes a context length of 512, a mini-batch size of two, and accumulation over four mini-batches. On one device, a full accumulation cycle therefore draws gradients from eight examples before an update. A partial final cycle can contain fewer examples.
I would not present these values as a recipe that fits every task. Sequence lengths, dataset size, model size, memory, and the intended behavior all affect the choices.
The mistake: three steps is not three epochs
I initially left the run configured for three maximum steps when I intended three epochs.
Those are different instructions. Three optimizer steps means three updates. Three epochs means three passes through the training dataset; the number of updates depends on the dataset and batching configuration.
The short run completed. That did not mean I had trained the model for the amount of work I intended.
I returned to the configuration, changed the training-length mode to epochs, set it to three, checked the preview, and ran the experiment again.
▶ Watch this part: steps versus epochs (18:03)
This is why I think a small first experiment is valuable. I can make a mistake, understand it, and repeat the run without turning the correction into a large project.
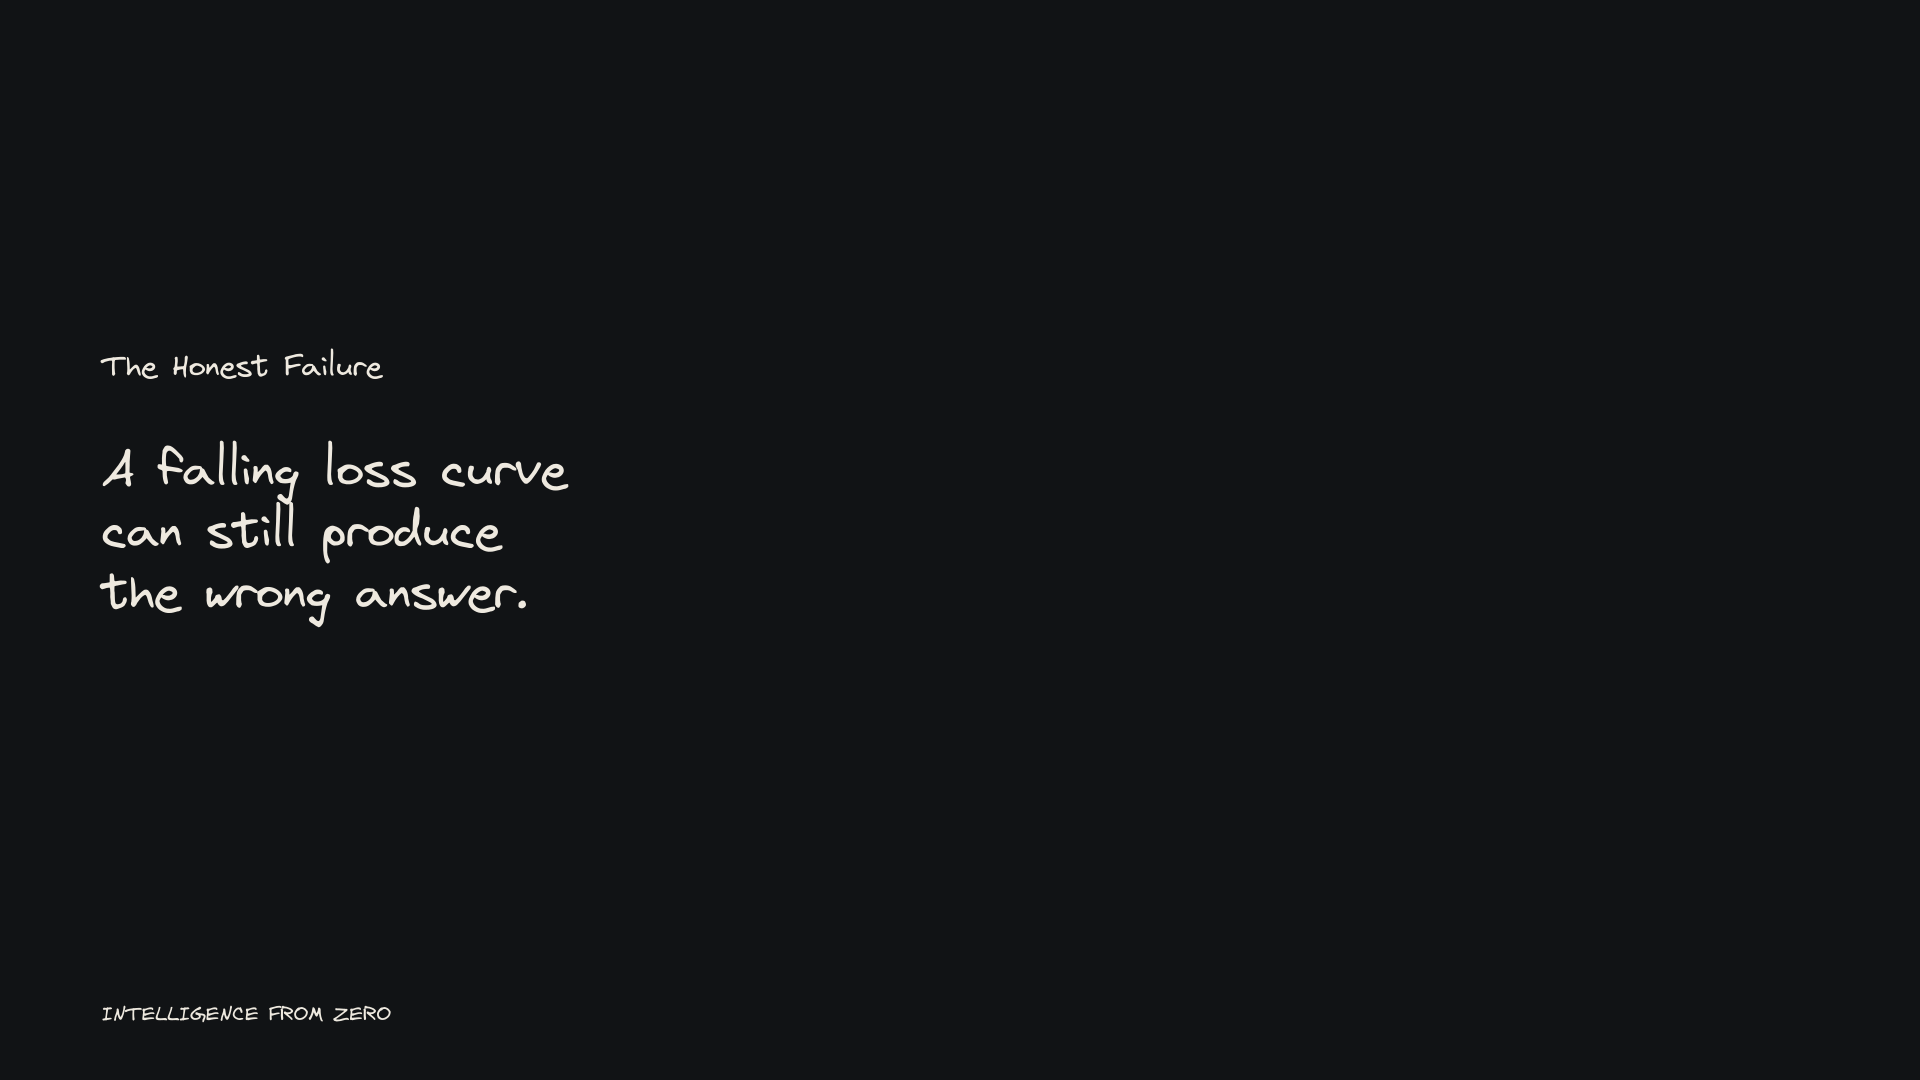
The charts in the second run looked more encouraging. That still left the important question unanswered.
Lower loss is useful evidence, but it does not finish the evaluation
Training loss measures the objective the model is optimizing on the training data. Validation loss measures that objective on the validation data.
Neither is a direct count of correctly classified finance incidents.
The other charts have different jobs too. Gradient norm describes the magnitude of gradients; it is not itself the size of the optimizer’s update. The learning-rate curve reflects the chosen schedule. It is not supposed to decline simply because the model is becoming more capable.
I also would not diagnose the cause of a poor run from a few chart points alone. In this case, the configuration exposed the steps-versus-epochs mistake. The chart was a reason to investigate, not a complete explanation.
In the side-by-side chat comparison, the fine-tuned model produced a more suitable structured answer on the example I showed. That was encouraging enough to investigate further. It was not enough to establish reliable improvement across the task.
What the recorded evaluation actually showed
The broader comparison was much less dramatic than a single improved response might suggest.
In the recorded walkthrough, I report a composite score of 75 for the fine-tuned model and 74 for the base model. The category check improved from 11 correct cases to 12.
That is a small observed difference on that evaluation. The composite score combines checks; it should not be described as classification accuracy. One comparison also does not establish that the improvement is robust across new cases or repeated runs.
▶ Watch this part: the evaluation comparison (25:54)
The result tells me where the next work begins. I need to inspect the failures: which labels are confused, whether the examples reflect the policy, and whether the apparent improvement comes mainly from structure rather than better decisions.
I would choose one change I can explain, make it, retrain, and evaluate again. If I change the dataset, model, and training configuration together, a better result will be harder to attribute.
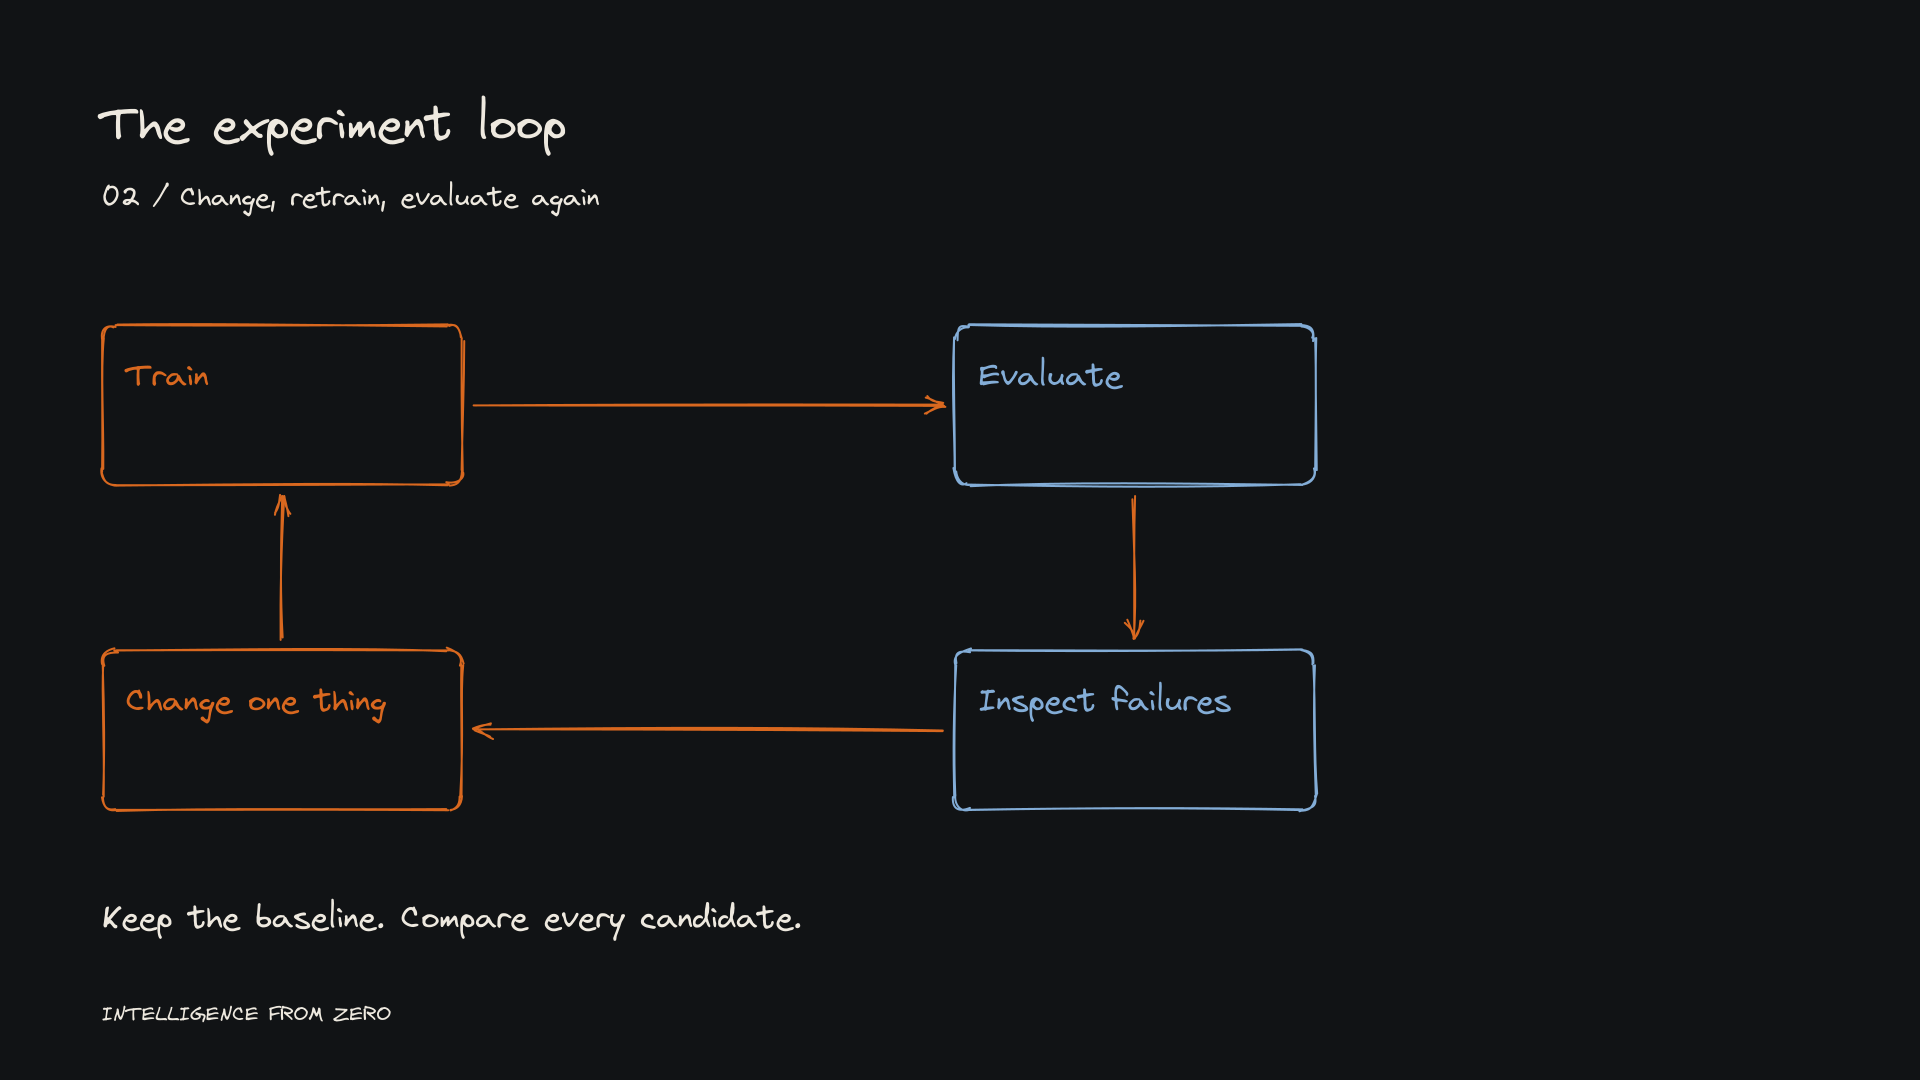
The next experiment might add examples around a confused category boundary. Or it might correct inconsistent severity labels. Those are hypotheses to test, not improvements I can claim before running the comparison.
Exporting the model is another boundary to check
Once I had a candidate to work with, I exported it as GGUF using the Q4_K_M option shown in the tutorial.
GGUF is the runtime file format. Q4_K_M is a quantization preset. Quantization during adapter training and quantization for the exported runtime artifact serve different purposes; selecting four-bit training does not make them the same operation.
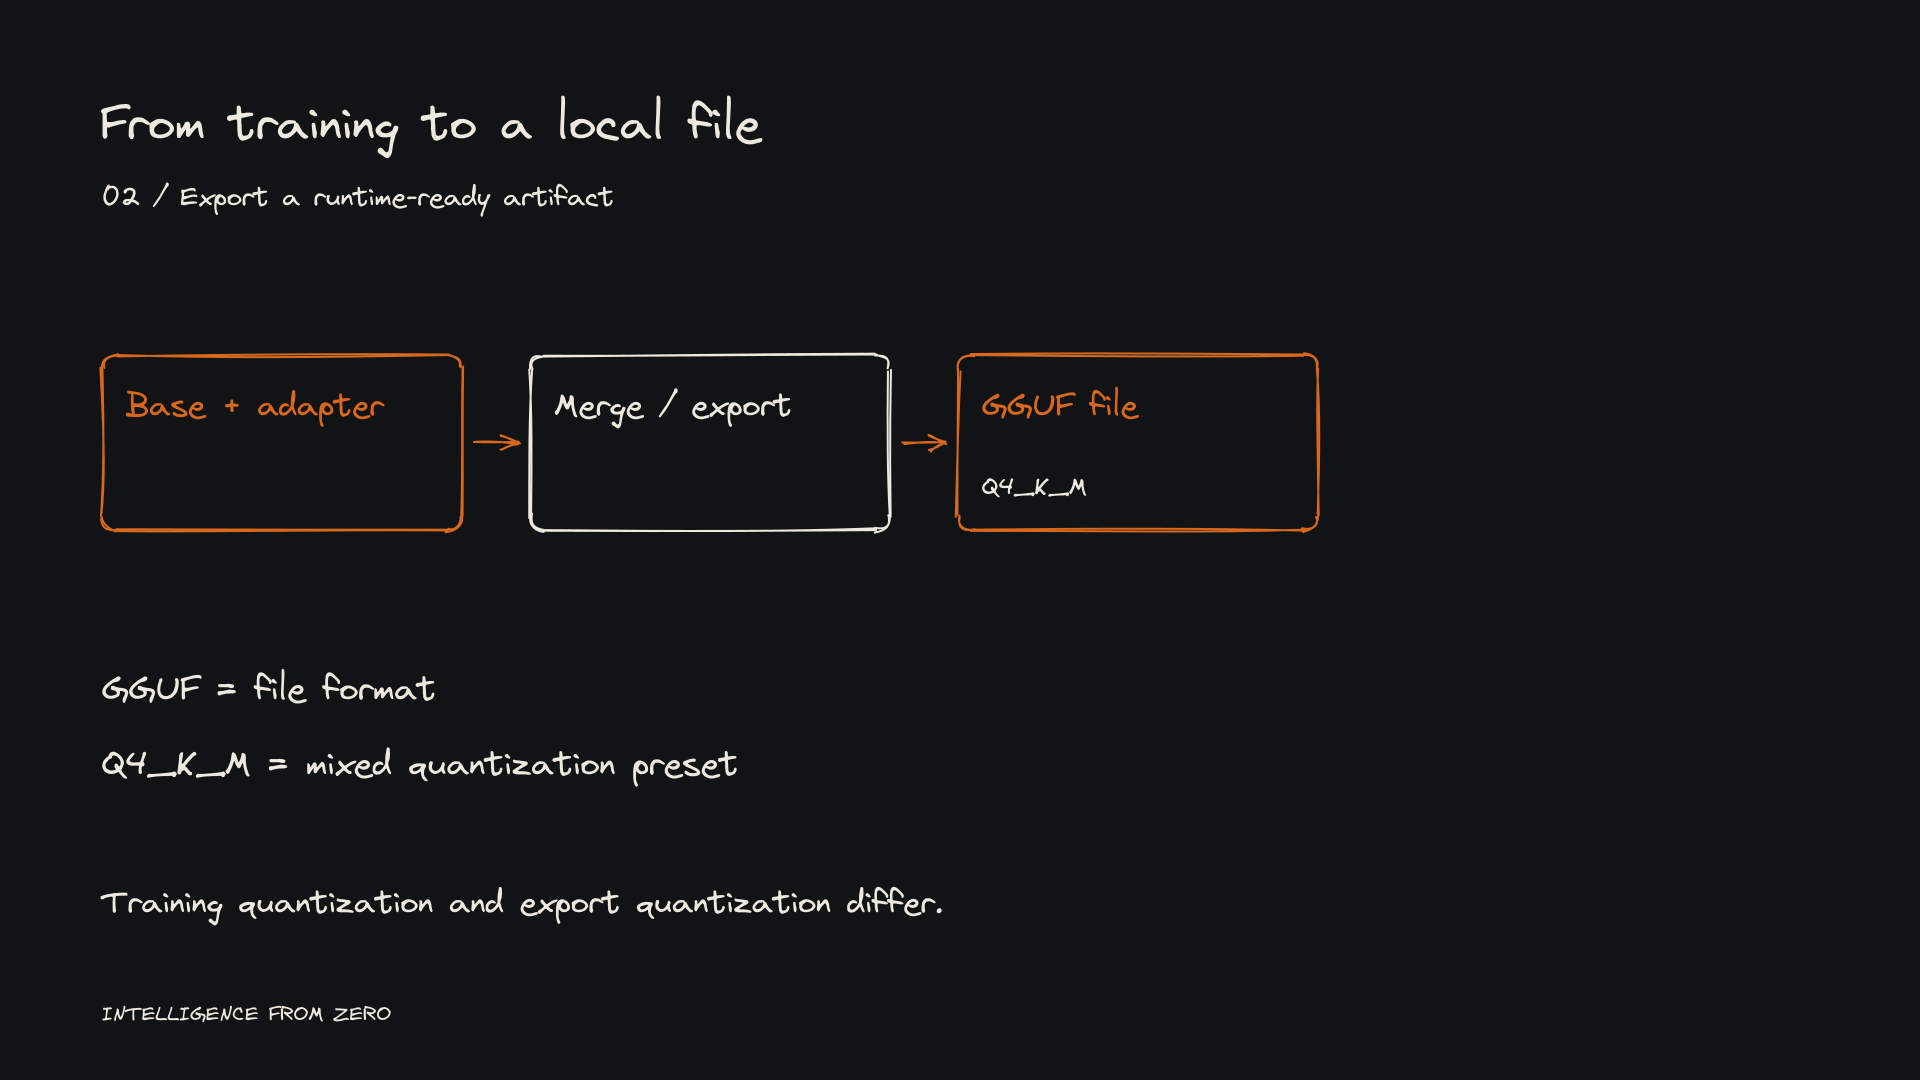
After export, I loaded the model from the local device and ran an inference check. That confirmed that the exported artifact could load and produce a response on the example tested.
It did not prove that all evaluation results survived export unchanged. Before relying on a particular exported version, I would run the same evaluation against that version too.
Call the model from a normal Python application
The last step was the one that made the whole exercise feel connected to application development.
I used the OpenAI Python client with Unsloth’s local, OpenAI-compatible endpoint. The client sends the system instructions and incident to the loaded model, then reads its response.
The public project contains the concrete client used in the earlier published experiment. For your own run, use the endpoint, token, and loaded model identifier shown by your local server rather than copying an identifier blindly.
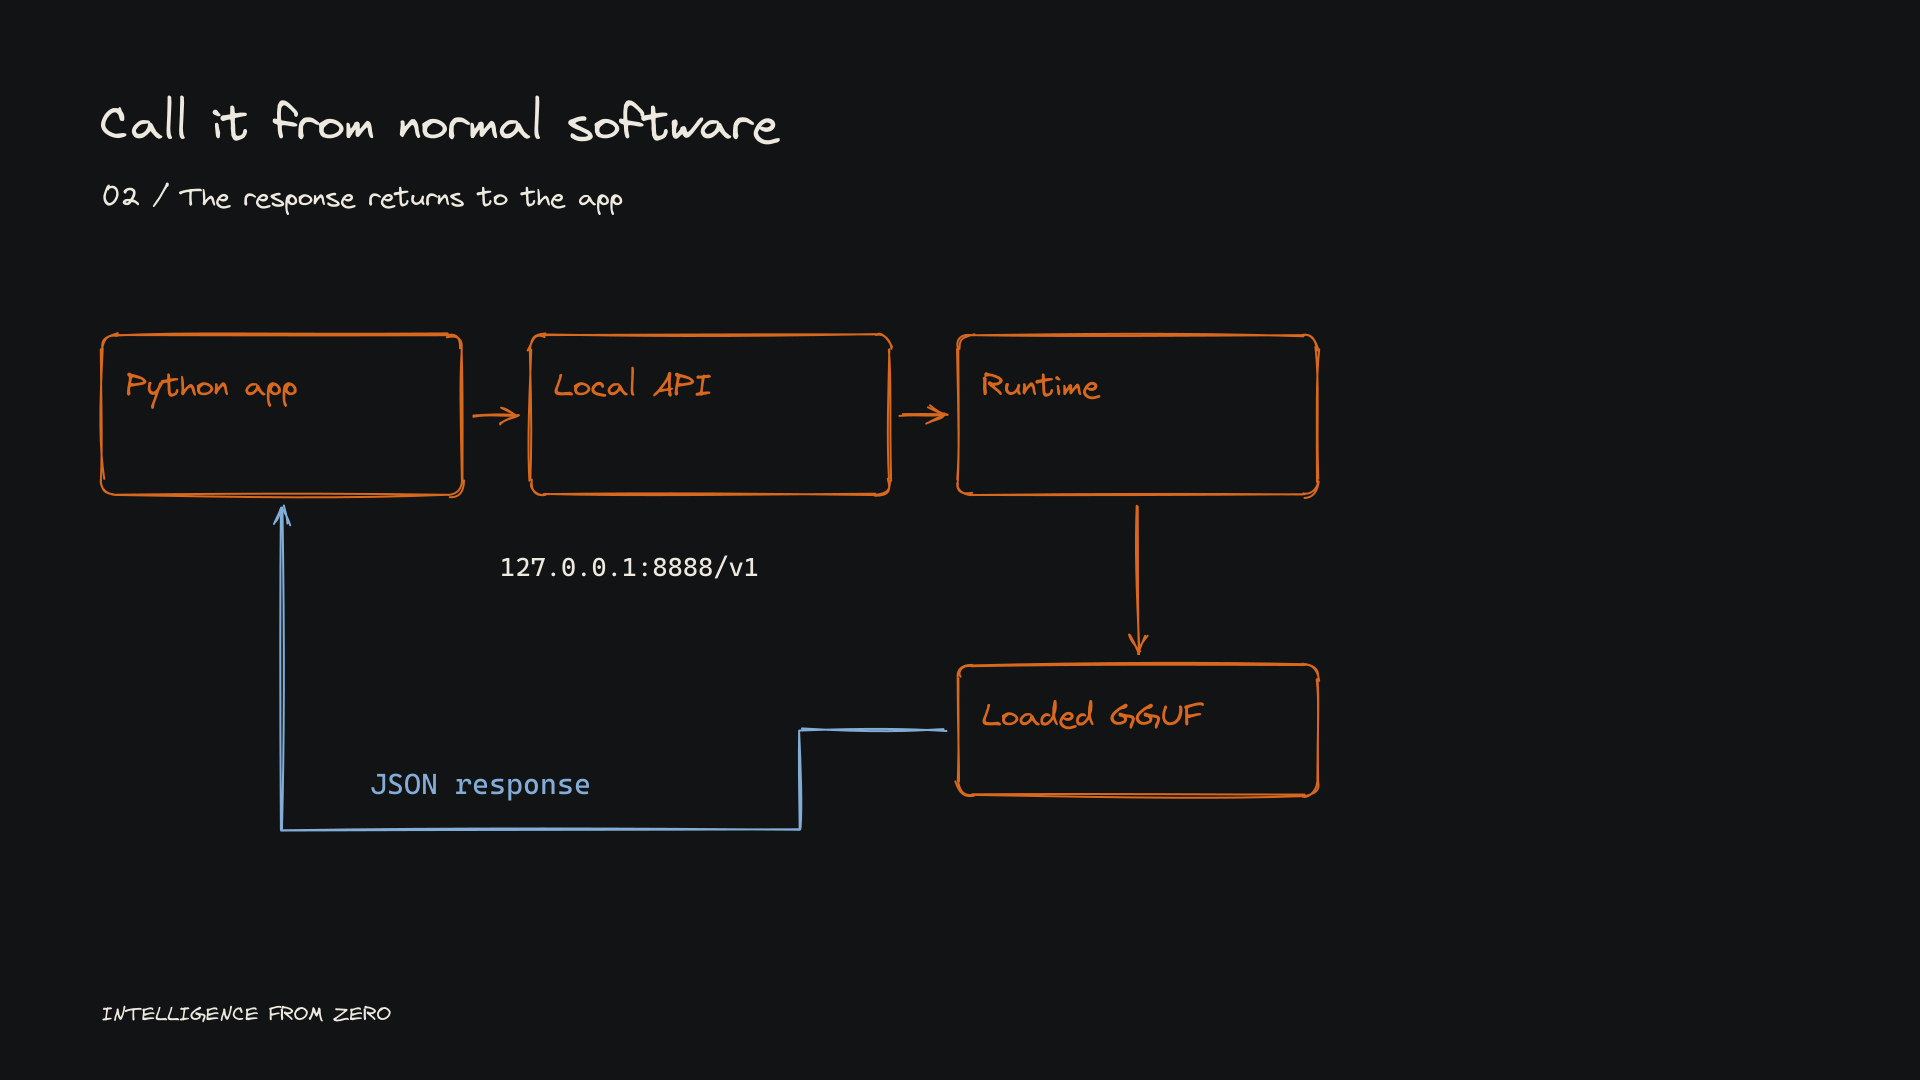
This changes the role of the desktop application. It becomes the runtime serving a model that other software can call.
The application still needs to parse the output, validate the schema and allowed values, handle failures, and decide which actions require review. Receiving JSON is not the same as receiving a correct decision.
▶ Watch this part: Python integration (33:05)
The finished artifacts should be inspectable
I published the earlier v0.1 experiment so the work has a record outside the video: code, data, configuration, evaluation notes, and model artifacts.
The repository and Hugging Face pages below belong to that earlier experiment introduced at the start of the tutorial. They should not be confused with the separate training run and the 74-to-75 comparison shown later in the video.
- Code and experiment notes on GitHub
- The published v0.1 dataset on Hugging Face
- The published v0.1 model on Hugging Face
I find this part of the process important because it forces me to distinguish what I built from what I measured. Someone should be able to inspect the examples and evaluation notes without having to infer the whole experiment from a screenshot of a successful run.
A useful model still needs a system around it
The classifier is a learning artifact. I would not put it in charge of moving money because it returned a plausible next action.
A working application needs current context, reliable validation, access controls, error handling, and a defined boundary between a recommendation and an action. Consequential actions may require human approval.
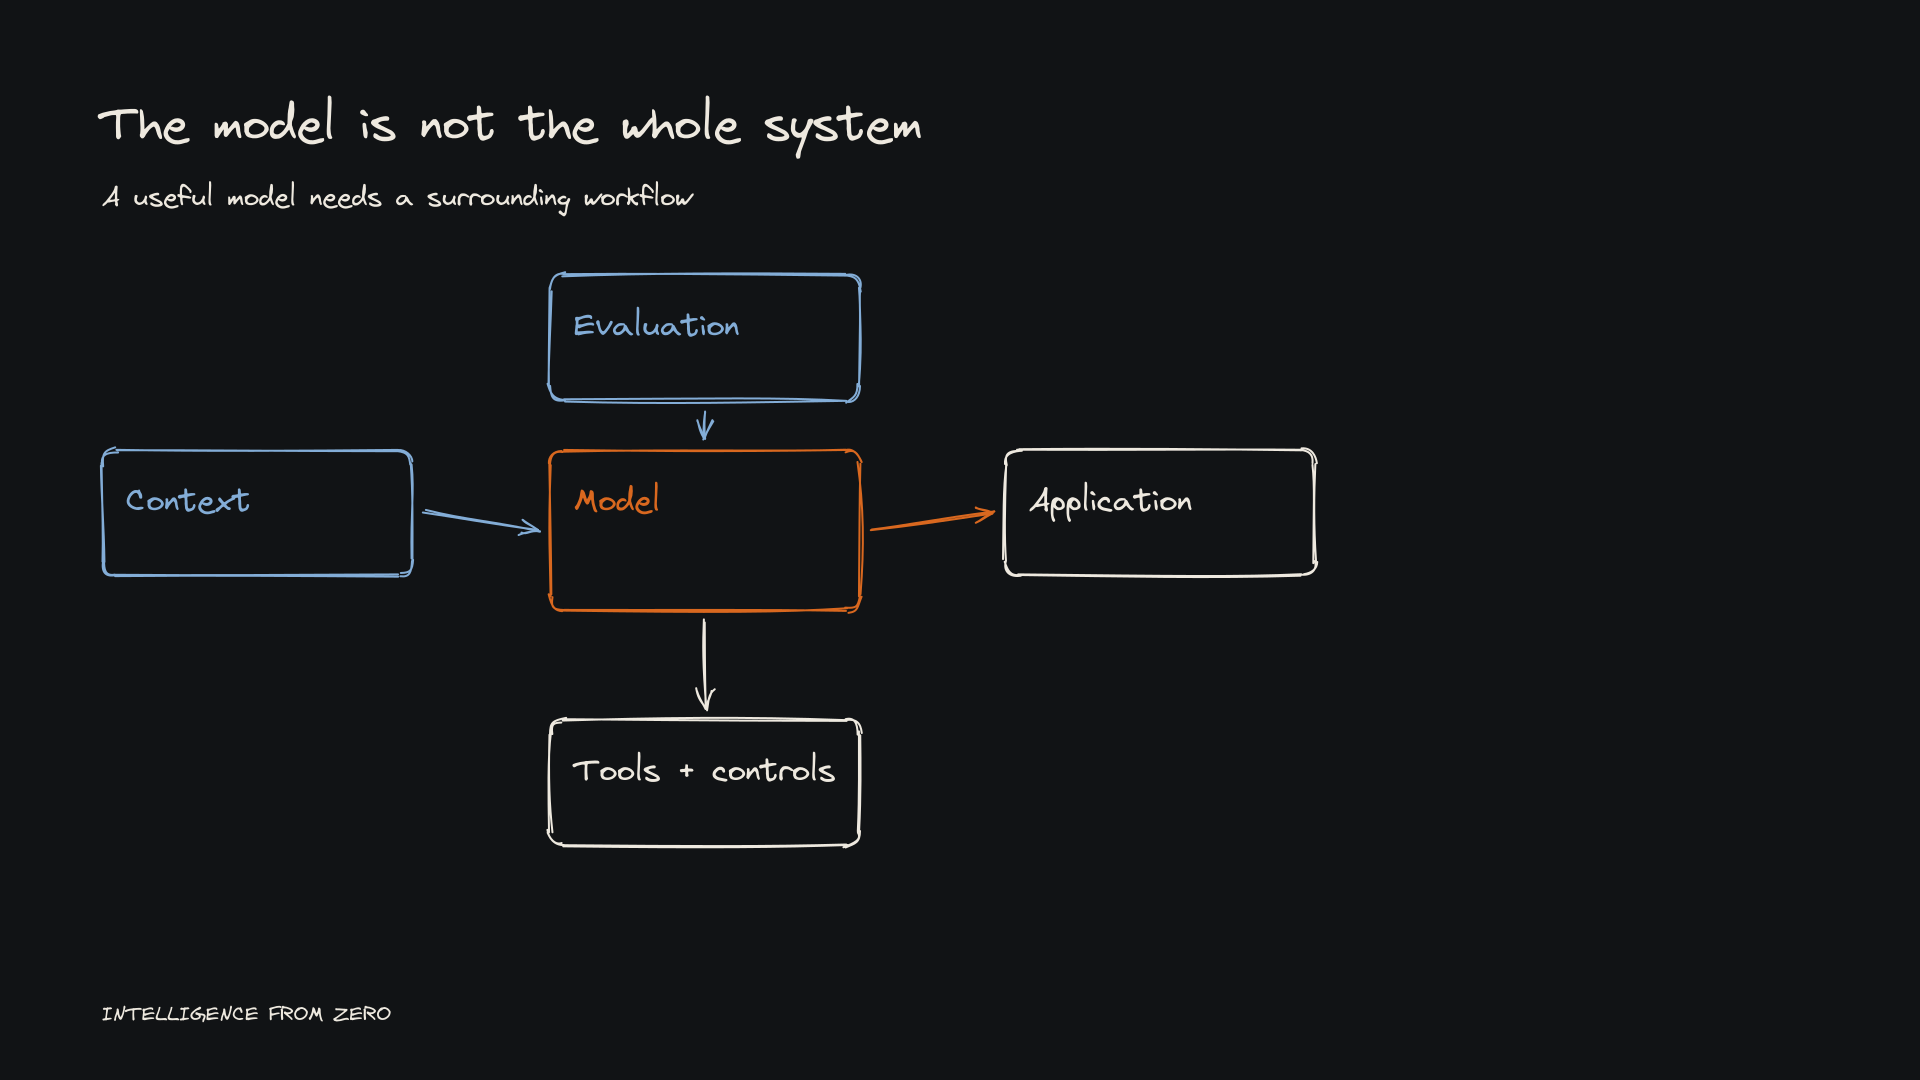
Fine-tuning helps with one component. The engineering work continues around it.
For a first project, I would keep the scope deliberately narrow: one small model, one task, examples I can inspect, and an evaluation I can repeat.
The milestone I care about is being able to explain every stage: why I chose the task, what the examples teach, how the original model performed, what changed after training, what still failed, and how the exported model is called from software.
Once I can do that, I have a much better basis for deciding what to scale.
What task would you choose for your first fine-tune — and what evidence would convince you that it improved?
New tutorials every Wednesday and Saturday.
Subscribe on YouTube for the videos, or on Substack for the written versions.